In 2002, MTN became the second telecommunication network to carry out its operations in Nigeria. Since then, the company has continued to grow, with more people subscribing to it. Presently, there are over 70 million people subscribers on the MTN network.
History of MTN
MTN was established in 1994 as M-cell with assistance from the government of South Africa. In 2002 when they came to Nigeria, Phuthuma Nhleko was the CEO of the company. However, he was replaced the same year by Paul Edwards.
He invested in the growth of the company in Nigeria. At that time, the company was the second-largest telecommunications company in South Africa after Vodacom. But, few years in Nigeria, became the largest telecommunications company in South Africa.
In 2008, MTN purchased Verizon Business South Africa, which provided data services to customers in the country and four other African countries. The acquisition was finalized a year later. MTN also merged with Belgacom International Carrier Services ( BICS), which is a subsidiary of Belgacom.
Why You Need MTN Internet Settings
To have access to the Internet with a mobile phone, or a modem, or tablet, you need to activate it by loading the GPRS or Internet settings of the network on your mobile phone. Although a mobile phone may have the capabilities to browse the Internet, it needs to be activated with GPRS settings before browsing the Internet.
Browsing the Internet with mobile makes it easier. It also means you can use the Internet from anywhere, unlike when you use a computer.
If you are using an MTN sim card and want to enjoy good internet service, there are many ways to achieve it. One of such ways is to get your manual configuration settings right. However, you can start by looking for automatic configuration.
MTN Auto Configuration
Generally, if you want to get internet configuration settings from the MTN network without installing the settings yourself, use the function of auto-configuration. To complete this process, send an SMS “settings” to the number 3888. Usually, this should take about ten minutes for your phone to use this configuration.
When you reply to SMS from MTN, don’t forget to save your settings instantly to avoid mistakes. Sending “settings” to 3889 is free, so you won’t get charged for the SMS no matter how many times you send it.
There are times your phone won’t be able to receive automatic configuration settings. When this happens, you need to set up the configuration manually. However, it is not as difficult as it seems.
MTN manual configuration

Configuration settings
For those using an old mobile phone or some unpopular brand of mobile phones, you will find it difficult to get automatic configuration from MTN. The following settings are perfect for you.
Name: MTN WAP
IP address: 10.199.212.2
Port: 9201
Username: web
Password: web
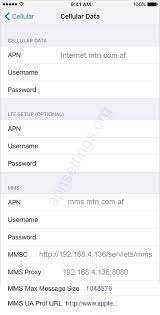
Access point name ( APN) : web.gprs.mtnnigeria.net
Homepage: wap.mtnonline.com
For those who use a smartphone such as Android, Microsoft, IOS. You can use the method below.
Name : MTN WEB
Port:
Username:
Password:
Access point name ( APN): web.gprs.mtnnigeria.net
Homepage: wao.mtnonline.com
Furthermore, some forget about the right proxy settings for your smartphone. To ensure that you have them in the proper order, follow the steps below.
Navigate to settings
Find the section “mobile network.”
Open the section “ Access point name, ” and click “MTN WEB” or “MTN GPRS.”
Delete the port address ( 8080).
Save the changes you made and browse again.
After all these steps, your phone should be able to use the internet service of the MTN network. If there are problems with connectivity, you can visit the closest MTN office or contact the MTN support services.
Abbey Johnson has a Masters degree as an engineer and has over 3 years of teaching and research experience. He is happiest when on a bike and is also interested in electric energy and computer Science.

